
You notice it when you step out of the tub. There’s a small puddle near the base, or a damp spot shows up on the ceiling below, or the faucet keeps dripping long after you shut it off. In Las Vegas homes, that kind of leak rarely stays small for long. Hard water wears on seals, older tubs often have mixed metal and plastic parts, and wasted water shows up on your bill fast.
If you’re searching for how to fix a leaky bathtub drain, the good news is that some leaks are absolutely manageable with the right tools and a careful approach. The bad news is that a lot of online advice skips the part that matters most. Finding the exact leak point before you start taking things apart. It also ignores the drain types and hidden damage issues that are common in Las Vegas, Henderson, and North Las Vegas properties.
That Annoying Drip Just Became a Real Problem
A bathtub leak usually starts with something that looks minor. A ring of moisture around the drain. A cabinet wall that feels damp. Paint on the ceiling below that starts to bubble. The drain opening itself is often assumed to be the problem, but that’s only one possibility.
In Las Vegas, I’ve seen homeowners chase the wrong repair because the leak only appears when the tub is full, or only while the shower is running, or only after the faucet drips for hours. Those are three different clues. They point to different parts of the tub assembly.
What homeowners usually notice first
Some signs are obvious. Others are easy to dismiss.
- A puddle after bathing usually points toward the drain body, gasket, or shoe connection.
- A leak only when showering can mean the overflow plate or upper wall penetration is involved.
- A steady faucet drip often gets ignored because the tub still drains fine.
- A stain downstairs means water has already moved beyond the bathroom finish materials.
Practical rule: If water is showing up outside the tub, the leak has already made it past the first seal.
That’s why speed matters. A bathtub leak can damage subflooring, drywall, framing, and finished surfaces long before the problem looks dramatic.
Why Las Vegas homes have their own quirks
Local homes add a few wrinkles to what should be a simple repair. Hard water leaves mineral buildup around stoppers, threads, and gaskets. Older neighborhoods may still have metal drain sections that corrode from the outside in. Condos and two-story homes create another problem. Water may travel before it appears, so the stain you see may not sit directly under the leak.
A clean repair starts with diagnosis, not guesswork. If the leak is coming from a worn flange seal, that’s a direct fix. If it’s coming from a hidden pipe joint, corroded trap arm, or an access problem behind the tub, forcing a DIY repair can waste a weekend and make the damage worse.
Diagnosing Your Bathtub Drain Leak Like a Pro
A tub can look like it has one leak when it has three possible sources. I see that a lot in Las Vegas homes. Hard water buildup hides failed seals, older metal waste-and-overflow assemblies rust from the back side, and water often shows up far from the actual failure point.
Start by separating standing-water leaks from running-water leaks. That one step keeps you from tearing out a drain flange when the overflow gasket or faucet is at fault.
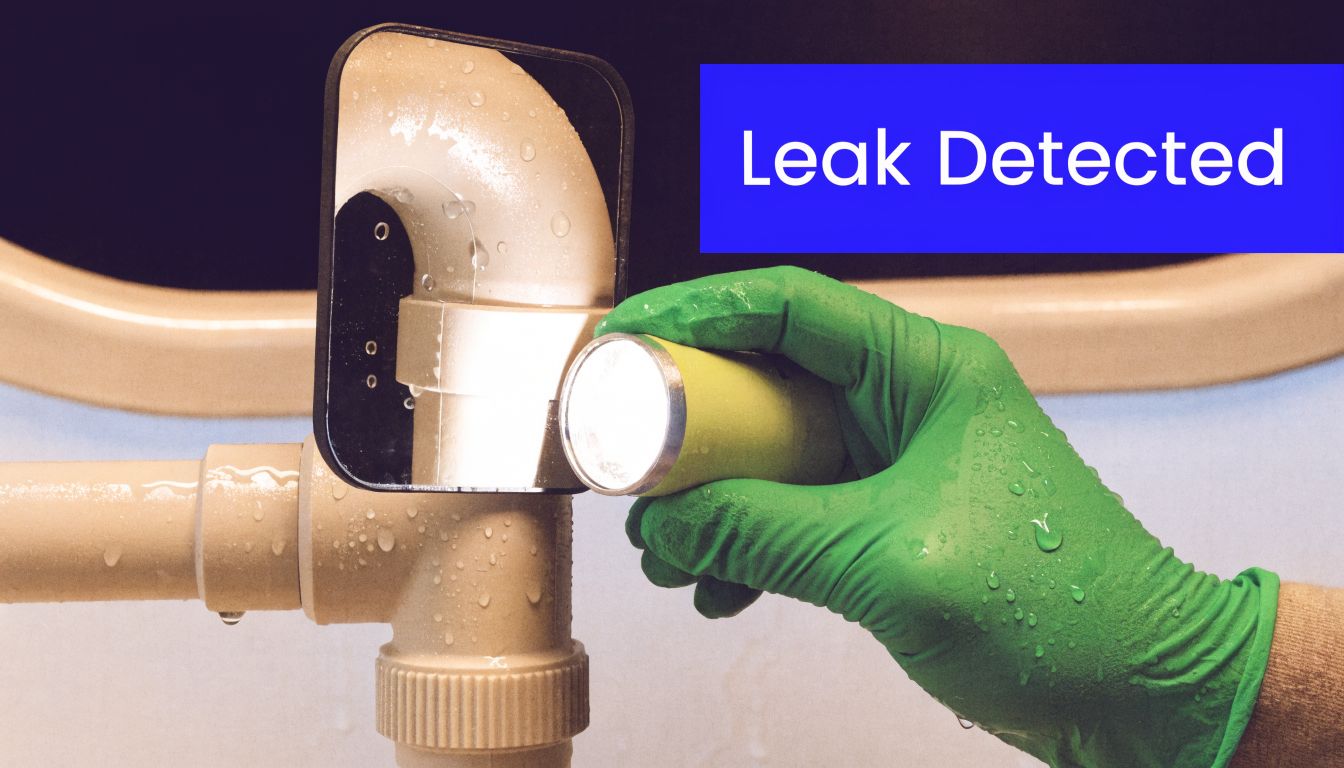
Start with the isolation test
Dry every accessible part of the drain assembly first. Use a flashlight, a small mirror, and paper towels under the shoe, around slip joints, and near the overflow connection if you have access.
Then run two tests.
First, plug the tub and fill it with a few inches of water. Mark the water line and let it sit. If the water level drops and the towels below the drain get wet, the problem is usually at the drain flange, the gasket under the tub, or the shoe connection.
Second, drain the tub while watching those same spots. If it stays dry when the tub is full but leaks once water starts moving, look lower in the waste line, at a slip joint, or at a crack in an older drain assembly.
That distinction matters.
What usually leaks, and what the pattern tells you
| Leak point | What you’ll notice | What it usually means |
|---|---|---|
| Drain flange | Water shows up after bathing, especially around the drain opening or directly below it | Failed plumber’s putty, damaged threads, or a pitted flange surface |
| Gasket below the tub | Leak appears only when the tub is holding water weight | Compressed, brittle, or misaligned gasket under the drain shoe |
| Overflow plate assembly | Leak starts near a full tub level or during showers | Overflow gasket is loose, cracked, or installed crooked |
| Waste-and-overflow joints | Leak appears during draining, not during a standing-water test | Loose slip nut, corroded joint, or split tubular section |
| Faucet spout | Constant drip into the tub even when off | Worn cartridge, stem, or internal washers |
Check the faucet before you pull the drain
A steady spout drip can keep the tub wet enough to mislead you. It also wastes water. The EPA WaterSense program notes that household leaks such as dripping faucets can waste thousands of gallons over time, which is why I check the faucet early instead of assuming the drain seal is the problem.
If water is coming from the spout when the handles are off, inspect the faucet assembly before you touch the drain body. On many tubs, that repair is simpler than removing an old flange that may be seized by mineral scale.
How to tell if the overflow is causing it
The overflow gets missed all the time because the lower drain is easier to see. On a shower-over-tub setup, the overflow gasket is a common failure point because water hits that area during use, even when the tub is never filled high.
Test it directly. Run water against the overflow plate or fill the tub to just below that opening, then check behind the access panel or underneath the tub if you can reach it.
Signs that point to the overflow:
- Leak shows up only when the water level is high
- Leak appears during showers more than baths
- Faceplate is loose or pulls away from the tub wall
- Caulk around the plate is hiding a bad gasket instead of fixing it
Caulk on an overflow plate is a red flag. The seal belongs behind the plate at the gasket, not smeared around the trim.
If access is limited, or the stain is showing up in a ceiling below and not directly under the tub, use a proper water leak detection in Las Vegas service before opening walls. Water often follows framing in two-story homes and condos, which makes visual guessing unreliable.
Drain type matters more than many DIY guides admit
Before ordering parts, identify the drain style. A lift-and-turn, toe-touch, trip-lever, or push-pull stopper changes how you remove the trim and what can be serviced from above. Older tubs in Las Vegas may also have brass or steel components tied into newer plastic sections, and those mixed-material assemblies do not always come apart cleanly.
If you need a visual reference for trim styles and assemblies, browsing different drain wastes can help you match what you have before you buy the wrong parts.
A few clues should change your repair plan fast:
- No visible crossbars in the drain can limit removal options from above
- Heavy white or green mineral buildup means threads may seize or crumble during removal
- Rust staining around the shoe or overflow often points to metal deterioration behind the visible trim
- Leak appears several feet away from the tub can mean water is traveling along pipe or framing, not leaking where the stain shows
- Flex in the tub floor near the drain can signal movement that keeps breaking the seal, especially in older subfloors
That last one is where a DIY repair often crosses into pro work. If the tub is moving, the framing or subfloor may be part of the problem. Repacking the drain with fresh putty will not hold for long if the structure under it is failing.
Essential Tools and Materials for Your Repair Project
A bathtub drain repair gets frustrating when you start with half the parts and the wrong wrench. Before taking anything apart, stage the tools, protect the tub surface, and make sure the replacement parts match your existing drain.
The core tool kit
You don’t need a truck full of specialty gear, but you do need the basics.
- Drain wrench or tub drain removal tool for slotted or crossbar-style drains
- Channel-lock pliers for nuts below the tub and stubborn fittings
- Flat screwdriver and Phillips screwdriver for covers, stoppers, and overflow hardware
- Putty knife or scraper to remove old putty or sealant
- Flashlight and small inspection mirror to see behind the tub or into access areas
- Rags and paper towels for cleanup and leak testing
- Bucket in case residual water drops from the assembly
If you’re shopping for replacement trim or want to compare styles before opening up the tub, browsing different drain wastes can help you identify what type of tub waste and stopper setup you’re working with.
The parts that usually matter most
The wrong replacement part is one of the main reasons DIY repairs stall halfway through.
Keep these on hand if you’re planning a standard drain-body repair:
- New drain flange if the old one is warped, corroded, or badly pitted
- New gasket for the underside seal
- Friction washer and retaining nut if your existing hardware is worn
- Thread seal tape where threaded connections call for it
- Plumber’s putty or silicone, depending on the tub material and drain design
Putty or silicone in Las Vegas
While much generic advice often falters, on many standard metal flange installations, plumber’s putty remains a solid choice because it’s workable and easy to reset. But not every tub or drain body should get the same treatment.
Use this quick comparison as a guide:
| Material | Best use | Watch out for |
|---|---|---|
| Plumber’s putty | Traditional drain flange sealing on compatible surfaces | Must be fully cleaned off before reassembly |
| Silicone | Some tub materials and specific manufacturer setups | Harder cleanup and longer cure time |
| EPDM or factory gasket | Where the assembly is designed for replaceable sealing parts | Must match the drain system correctly |
In Clark County’s mineral-rich water, material choice matters. Some sealants don’t hold up the same way once buildup starts collecting around the assembly. When in doubt, match the replacement approach to the actual drain design instead of forcing one product onto every repair.
A Step-by-Step Guide to Fixing Common Drain Leaks
A bathtub drain repair goes well or goes sideways in the first few minutes. If you remove the flange without confirming the leak path, or you force the wrong stopper type, a simple seal job can turn into stripped threads, a damaged shoe, or a leak that keeps showing up in the ceiling below.
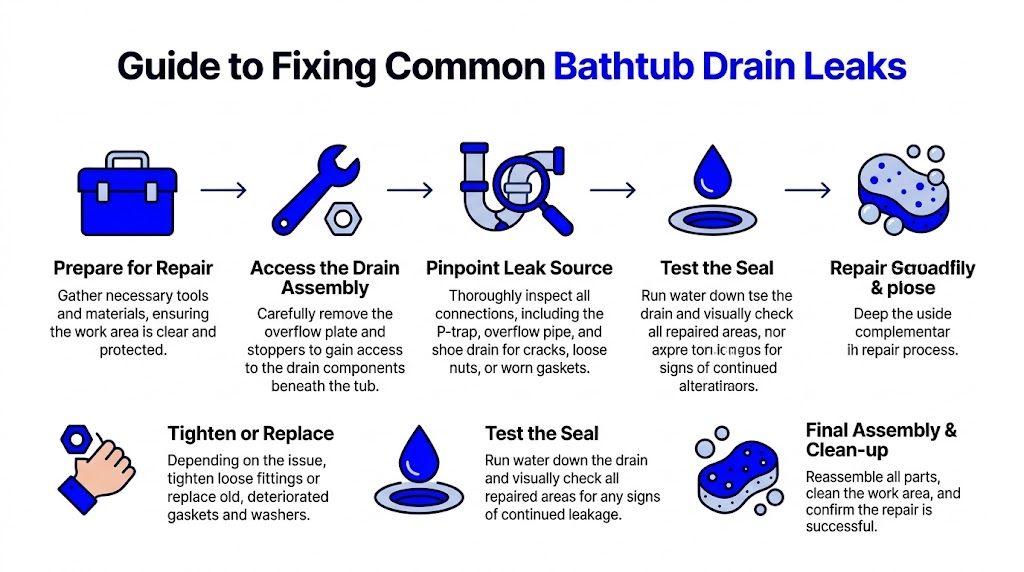
Confirm the leak before disassembly
Start by proving where the water is escaping. Dry the area under the tub or the ceiling below, place paper towels where drips usually appear, plug the drain, and fill the tub with a few inches of water. If it leaks while the tub is holding water, the drain body, flange seal, or gasket is the likely problem.
If it only leaks when water is running out, look harder at the waste shoe connection, overflow assembly, or the drain line itself. That distinction saves time and keeps you from rebuilding the wrong part.
A careful diagnosis beats doing the same repair twice.
Removing the stopper and flange without damaging it
The visible drain opening does not tell you everything. Lift-and-turn stoppers, toe-touch stoppers, trip-lever setups, and older linked popper assemblies come apart differently, and older Las Vegas tubs often have enough mineral crust to hide the actual fastener points.
Remove the stopper first using the correct method for that style. Then use a drain wrench or tub drain tool to back the flange out counterclockwise. Keep the pressure steady. Sudden force is how people chip porcelain, slip into the tub surface, or crack a weakened drain shoe.
If you need a visual on the removal sequence, this guide on how to remove a bathtub drain is a good reference.
Clean the sealing surfaces all the way down
Once the flange is out, remove all old putty, silicone, soap residue, and hard-water scale. The new seal has to sit on a flat, clean surface. In Las Vegas, mineral buildup is a significant factor. I see drains that look salvageable from above, then fail to seal because scale or corrosion keeps the flange from seating evenly.
Check the exposed parts closely before you reinstall anything:
- Warping on the flange lip
- Corrosion or pitting on the flange or shoe
- Cracked, flattened, or hardened gasket material
- Cross-threading on the drain shoe
- Mineral buildup around the opening or threads
- Soft or darkened subfloor material around the tub cutout
That last point gets missed in a lot of DIY guides. If the wood around the drain opening is swollen or starting to break down, the leak has probably been active longer than you thought. In more advanced repairs or remodel work, it may make sense to install a moisture barrier subfloor so future leaks do less damage.
Rebuild the drain assembly with the right seal for that tub
Match the repair method to the drain design and tub material. A standard metal flange in good condition often seals well with plumber's putty. Some manufacturer setups call for silicone or a factory gasket instead. Forcing one product into every repair is where a lot of callbacks start.
Use this order:
- Apply the correct sealing material under the flange lip
- Thread the flange in by hand first so it starts straight
- Align the gasket and washer below if the assembly uses them
- Tighten until snug with a drain tool
- Clean off excess sealant at the flange edge
Snug matters. Too loose and it leaks. Too tight and you can distort the gasket, strip threads, or crack an older brass or plastic shoe.
Stopper style changes the repair
This is one of the big misses in generic bathtub leak articles. A lot of older Las Vegas homes have drain assemblies that do not behave like the common lift-and-turn examples shown online. Some linked stoppers tie into the overflow, and some older popper-style parts resist removal from above because the mechanism is not meant to come out that way.
Use this quick check before forcing anything:
| Stopper type | Typical clue | Common mistake |
|---|---|---|
| Lift-and-turn | Knob on top, manual twist action | Removing the cap and assuming the flange is loose |
| Popper or linked assembly | Odd resistance, hidden linkage, no obvious top screw | Twisting from above and damaging the mechanism |
| Corroded older stopper | Mineral crust, partial movement only | Using extra force instead of cleaning and identifying the parts |
If the flange will not turn with normal controlled force, stop and identify the assembly. Bigger tools do not fix the wrong approach.
Test the repair like a plumber
Let the sealant set according to the product instructions if cure time applies. Then fill the tub, mark the water line, and check below with a flashlight and a dry towel. After that, drain the tub and watch the assembly during flow. A repair that passes only the standing-water test is not finished yet.
A solid repair should:
- Hold water without a level drop
- Drain without seepage at the shoe or gasket
- Stay dry around the overflow, access opening, and surrounding framing
If it still leaks after a clean rebuild with the right parts, the problem is probably not the top flange anymore. At that point, you may be dealing with a cracked waste-and-overflow assembly, a failing drain shoe, or hidden water damage under the tub. That is usually where DIY stops being cost-effective and a plumber should take over.
A video can help if your stopper doesn’t match the common examples:
When Your Small Leak Is a Big Warning Sign
Some bathtub leaks are straightforward. Others are just the symptom you can see. The underlying problem sits behind the wall, under the tub, or inside an older drain line that’s already failing.
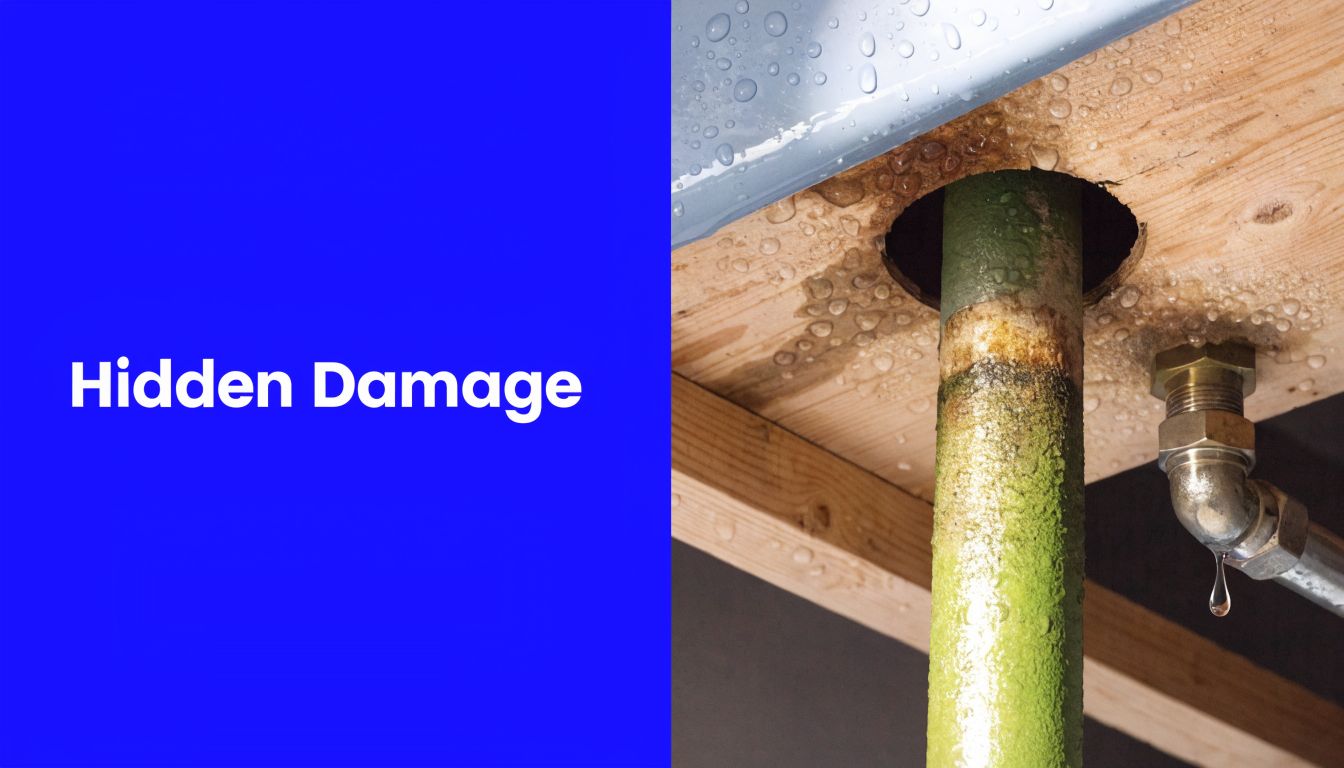
Older metal piping changes the stakes
In aging Las Vegas neighborhoods, some tubs still connect to corroded metal pipes. Those pipes can develop small leaks that get worse gradually, and modern PVC or ABS replacements offer superior longevity according to this bathtub drain leak reference.
That’s the kind of issue a new flange won’t fix. You can seal the top perfectly and still have water escaping farther down the line.
Warning signs include:
- Recurring leaks after a fresh drain repair
- Rust-colored staining
- Flaking metal or rough pipe surfaces
- A tub area that smells damp even when surfaces look dry
The same source notes that professional video inspection can catch corrosion before failure turns into major damage, which is especially useful when access is limited.
Ceiling stains and soft floors are not cosmetic issues
A stain on the ceiling below the bathroom is never just a paint problem. It means water moved out of the drain system and into building materials. In multi-story homes, condos, and apartment buildings, that often means the leak has reached joists, subflooring, or the ceiling cavity below.
If you’re dealing with flooring that has been wet for any length of time, it also helps to understand how builders and remodelers install a moisture barrier subfloor when addressing water-exposed assemblies. That won’t solve the plumbing leak, but it gives useful context for why wet structural layers need proper repair instead of a cosmetic patch.
Signs the job has crossed into pro territory
There’s a point where DIY stops being cost-saving and starts becoming expensive.
Call a professional if you’re seeing any of these:
- The leak shows up in a downstairs ceiling
- You can’t access the tub waste and overflow safely
- Threads are stripped or the drain body won’t seat correctly
- The tub has older metal piping
- The leak continues after replacing the flange and gasket
- There’s visible mold, rot, or soft wood nearby
Why hidden damage matters more in desert homes
Dry climates fool people. They assume moisture evaporates before it causes much trouble. What happens is that leaks can go unnoticed longer because bathrooms dry on the surface while framing stays wet where no one sees it.
That’s why hidden tub leaks can become expensive. Once water gets into framing or finished ceilings, the repair no longer belongs to the drain alone. It becomes a plumbing problem plus a structural repair problem.
The most expensive bathtub leak isn’t the one that gushes. It’s the one that leaks slowly behind finished surfaces for months.
A smart homeowner in Las Vegas, Henderson, or North Las Vegas doesn’t call a plumber because the repair “got hard.” They call when the risk profile changes. Hidden piping, structural moisture, and access limitations are where experience and inspection tools matter most.
Your Local Las Vegas Drain Experts Are Ready to Help
If your bathtub leak is simple, careful DIY work can solve it. If it isn’t, fast diagnosis is what protects the home. That matters even more in multi-story houses, condos, and rental properties where tub leaks can soak joists and subfloors before anyone realizes what’s happening.

An ASSE report noted that 40% of U.S. plumbing claims in desert climates stem from undetected tub drains, averaging $4,500 in repairs, as referenced in this video-based discussion of hidden bathtub leak damage. That’s the real reason to act early. It’s not just about stopping a drip. It’s about preventing hidden damage from spreading.
What professional drain service adds
A proper service call does more than replace visible parts. It answers the questions DIY work often can’t:
- Is the leak really at the tub drain, or farther down the line
- Are the surrounding pipes corroded, misaligned, or partially blocked
- Is there hidden moisture below the tub
- Does the drain need cleaning along with repair
When a tub is slow, backing up, or leaking repeatedly, it helps to pair repair with a full drain cleaning service in Las Vegas. That addresses buildup that can put extra stress on seals and connections.
Why homeowners call MG Drain Services LLC
MG Drain Services LLC is a licensed and insured, local Las Vegas company serving homeowners, landlords, and property managers across Las Vegas, Henderson, North Las Vegas, and Summerlin. The company provides experienced technicians, honest pricing, fast response times, and modern diagnostics including color video camera inspections.
For leak problems that go beyond a simple putty fix, that combination matters. You want someone who can find the leak, explain the trade-offs clearly, and fix the actual failure instead of guessing at the surface symptom.
Frequently Asked Questions About Bathtub Drain Leaks
Can I fix a leaky bathtub drain myself
Sometimes. If the leak is clearly at the drain flange or a worn gasket and you have decent access, a careful DIY repair can hold.
Call a plumber if the tub leaks only when full, water shows up below the bathroom, the drain assembly will not come apart cleanly, or the leak comes back after you reseal it. In Las Vegas homes, I also get cautious when the tub sits over finished ceilings, older waste-and-overflow assemblies, or patched subfloors. Those jobs can get expensive fast if the underlying problem is hidden below the tub.
What if my bathtub drain won’t unscrew
Stop before you force it. Bathtub drains use different stopper and drain-body designs, and the wrong removal method can crack parts, strip threads, or turn a simple repair into a drain replacement.
If you are not sure what type you have, go back to the detailed removal steps in the main repair section and match your drain before trying again.
Is silicone better than plumber’s putty
It depends on the tub material and the drain design. Some tubs call for a specific sealant approach, and some leaks are better fixed with the right replacement gasket instead of adding more sealant.
If the assembly was built around a gasket, replace the failed part rather than trying to make sealant do all the work.
Can a slow drain cause leak problems
Yes. Slow drainage keeps water sitting around weak seals longer and can expose a connection that was already starting to fail.
A slow tub can also point to buildup farther down the line. If the drain is leaking and draining poorly, treat both problems instead of fixing only the visible drip.
How much does professional bathtub drain repair cost in Las Vegas
The price depends on what is leaking and how much access the plumber has. Replacing a drain seal is a smaller job than opening a ceiling, correcting misaligned piping, or repairing water damage around the tub shoe.
The only honest price comes after the leak source is confirmed.
If your tub is leaking, don’t let a small drip turn into subfloor damage or a ceiling repair. MG Drain Services LLC provides fast, professional plumbing and drain service across Las Vegas, Henderson, and North Las Vegas. Call 702-480-8070 to schedule service, get honest pricing, and have experienced local plumbers diagnose the underlying cause of the leak before it gets worse.